Today's showing is my artist drawing book. I had started this years ago and had glued in some sayings and things I wanted to save. I decoupaged the cover then, not realizing I would be using it for my study in Ecclesiastes but somehow God worked in a way that it all tied together. I still have lots of room in the book to add to it as I do other studies. By the way, Ecclesiastes is one of my favorite Old Testament books.
This is the cover. (click on photos to enlarge)
I decoupaged a page from an old encyclopedia. (Later on I will show you what I did with the old books that were too old to salvage)
I added clip art sayings and then smudged things with ink pads.
You just take the ink pad that is pre-inked and rub it across or dab it. You can use a dry brush technique using water based paints the same way, The first layer was just torn paper from tissue to used coffee filters. This give an aged effect.
*************
First page....
I used water color pencils for the sunburst effect and basically colored in the colors and then dabbed with a damp brush to add strokes fanning out. I used a scanned copy from the Inspire Bible for the title page for Ecclesiastes. I cut out and glued to bottom of water color picture. I wrote out a verse in Ecclesiastes 1 at the top.
The printed sayings and Scriptures were the ones I added years ago that went along with my study. I glued in clip art and washi tap. The vertical strip on the left is a tip in. There are lots of these type scripture strips online just made to fit the jounaling Bible sides. The tip in is taped using washi tape. Washi tape can be found in any scrapbooking aisle. I find mine at Walmarts, Michaels and Hobby Lobby. There are a lot online as well.
These next 2 photos are from a study on Ezekiel. I dry brushed red and blue streaks across the left page and wrote out my Scripture and then glued in clipart around it. I found these cute kits on DaySpring (they no longer carry them) and bought a few on sale. I love them as they have the clip art already cut for you and you only have to glue it in.
The right side shows Scripture I typed and glued in along with pictures I got from Google Images. I have Corel and can put several photos onto one page so I compiled them and then printed to the tissue paper and glued in using ModgePodge.
On my study of Ezekiel, instead of writing out the Scriptures each time, I added some but mainly just wrote out my thoughts on the Scriptures I was studying at the time. I added the Google Image photos as clip art. The arrow is from colored paper that I cut with a die in my Sizzix machine. The arrows are terrific for pointing out a picture of thoughts I might want as a reminder later on.
*****************
This is a new lesson showing a yearly planner journal I used instead of as a planner. I love this one and not even sure where I got it. I may have ordered it online or someone gave to me as a gift.
But this is the cover.
It came with some cute Bible coloring pages. I love this one as it is a small ring binder and I can punch holes in my own paper or cardstock to add to it as I go along. I basically use this one and another as my main journals. I can take out some sections as it gets too full and then just bind these sections separately as I go along.
You can see from the above photo that this was a monthly section from the planner. I just glued and wrote over it adding some of the techniques I have shown. Since I began journaling, I have since bought white sticker paper that is plain. They also have clear. I can combine my prints using Corel and then print onto the sticker paper and cut out and have my own sticker. It eliminates having to use glue all the time. I bought my pretty cheap on Amazon in a 100 page pack.
I added tip-ins and tags.
This was using a column page from the planner. The word complete was a bought package of letter stickers. The pumpkin looking thing on the top left side is supposed to be an onion. You can see my drawing is not that good but doing journaling is for me to enjoy and learn from my studies not for perfection.
The butterfly is another pattern paper cut with my Szzix.
This is printed cardstock I bought that I punched holes and added. The right side has a narrow cardstock strip added with t Scripture column strip I glued on. It is like another narrow paged added.
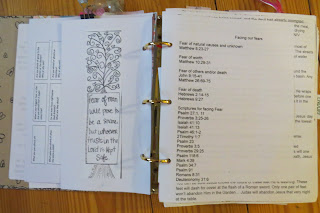
Sometimes to reinforce a lesson, I type out my thoughts and also some of the reading on the lesson itself and then print on plain printer paper and punch holes and add to the notebook.
I add little treasures to the notebook using an envelope cut down to size and punch holes and add to binder. I also add 3D objects by punching hole in one of the card stock pages I've already added and tie on object with ribbon. I label the envelope with Scripture link.
****************


No comments:
Post a Comment